Monday, January 11, 2010

The Legendary Lightning Boy Thunder Caps - hand made paper in oil caps.


My hand-made capacitors are paper in oil, with silver plated stranded wire leads that are teflon insulated.

Paper in oil caps have long been held in high esteem by audiophiles, recording engineers, and guitar players for their organic smooth tone and rich detail.  PiO caps are considered some of the most transparent sounding caps in existence.

Lightning Boy Audio (Gallery Acoustics) Fat Caps are used in many early audio creations by Lightning Boy Audio. Most commonly they are found in the EQ circuitry of LBA gear, including Soul Drive, Olympus and the SPEQ-1 passive Equalizer.

Thursday, January 7, 2010

Introducing the SPEQ-1 Super Passive Equalizer


Its Super bad ass. Actually the super in its name refers to the fact that it has no active components at all. In other words, there is no power supply or op amp for make up gain. Its passive in the truest sence. This strange fact allows for the user to select any mic preamp at his/her disposal to compensate for insertion loss. As this equalizer does have its own flavor, color is minimal and most of the color will come from the preamp you pair it with. For a pultec-type tone, pair it up with a good tube preamp.


Tuesday, January 5, 2010

Tweaking the EQ

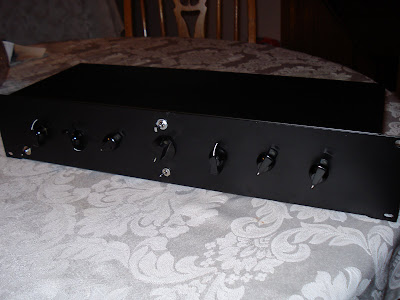
I had planned to paint my Pultec-esque equalizer and put some fancy lettering on it, but decided it needed some tweaking first. After using the eq extensively on a mix and also during Mastering, I decided certain things about it were not practical. ...and so I modified it.

The low band originally had a single rotary switch which selected frequencies for both the low cut and low boost simultaneously. I found this to be a hinder and so installed a second rotary frequency selector so that both sections of the low band can be controlled independently. Also i noticed during Mastering, the low frequency selector was not able to go down to the bottom sub frequencies (20-35Hz area). In my original design, the lowest setting was about 38hz. I'll have to test it to determine the exact frequency, but I believe it now sits around 25-30Hz. Also, I repositioned some of the knobs and switches so they are laid out in a more organized manner.

Tomorrow she gets a nice coat of gray paint. I plan to bake the chassis after painting it in order to make the enamel more durable. I heard baking it also makes it shine a bit more? I'll find out soon enough.
I have some clear avery labels that I could use to label it up. I figure its either that or I sharpie the bitch up. Pictures to come soon!

Friday, January 1, 2010

A different kind of Pultec Clone

My passive equalizer is finished! Its basically the filter section of a Pultec. Unlike a Pultec, there is no op amp for makeup gain. Instead, a preamp is required to compensate for insertion loss. This is pretty cool if you have a few different preamps laying around, as you can change the tone of the eq by selecting a different pre.

The eq is very natural sounding and very transparent. It has a slightly vintage/liquidy tone to it. Only NOS paper in oil capacitors were used throughout, as well as a Jensen input transformer and my home-made pultec inductor. I wanted to stick pretty close to the original pultec filter schematics. The only major difference is mine has 6 selectable frequencies for the high boost section, as the original had 7 frequencies.

I designed my own inductor around the original pultec, matching up the taps/frequencies (mH) to within less than 5% tolerance of the original. In the middle picture, its the square transformer-like thing at the bottom left. The giant metal thing in the center is actually just a capacitor that's being used for the low frequency filter. even though its a 14,000V cap, it still works perfectly in a 1V environment. I used it because it was the only paper in oil cap I had laying around that had the correct farads. If anything, it sounds slightly better than the rest of the caps lol.

Anyway, it sounds amazing! It really makes music come to life. IMHO, words can not describe what this does for audio. it takes mixing to a whole new level.

build cost was under $300, as I had most of the parts laying around and built my own inductor.